Panels
Overview
Section titled “Overview”Panels are saved groups of research participants that you build once and reuse across multiple studies. Each panel holds a pool of qualified respondents — vetted through screener questions, pulled from a previous study, or sourced from your own contact list. Instead of rebuilding your participant list for every study, you create a panel once and recruit from it whenever you need.
Before You Start
Section titled “Before You Start”- You need a Peppermint account with access to the Panels section.
- If you plan to use Use an existing panel as your source, make sure you have at least one previous study or saved panel already in your workspace.
How It Works
Section titled “How It Works”Creating a Panel
Section titled “Creating a Panel”-
Click Panels in the left navigation.
-
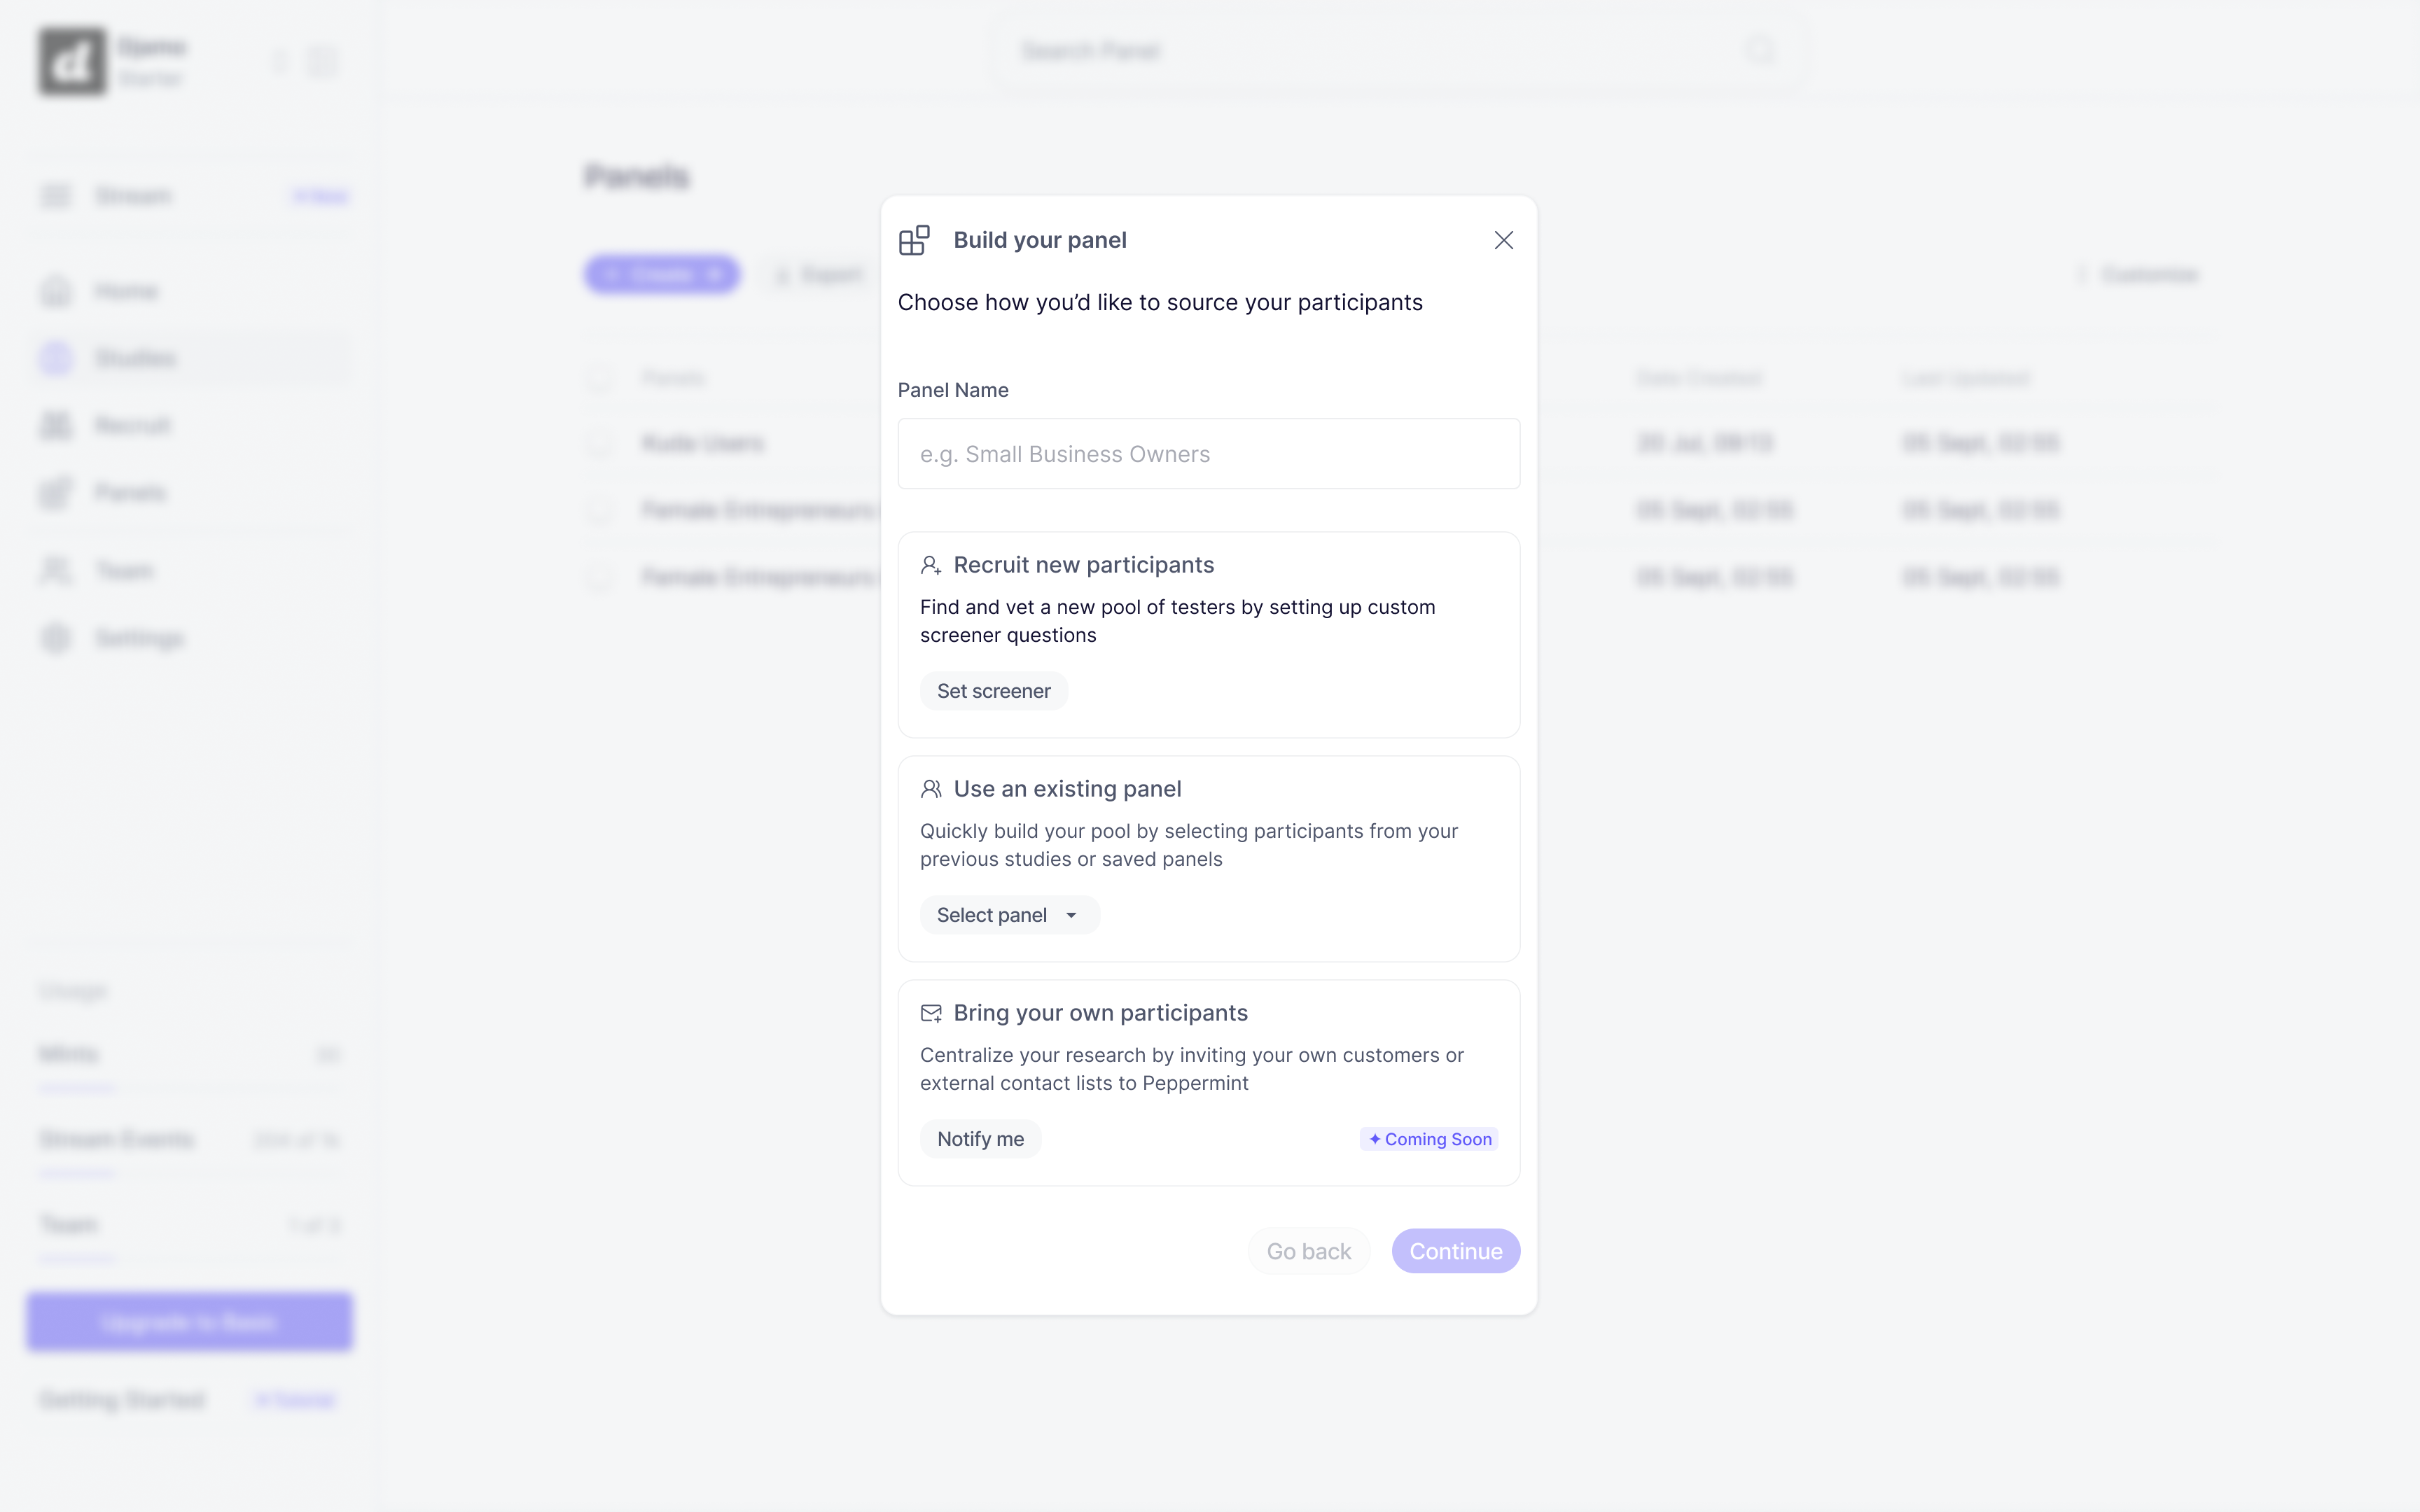
Click + Create. The Build your panel dialog opens.
-
Enter a Panel Name — use something specific so you can identify it at a glance (e.g. “Female Entrepreneurs in Accra”, “Self-employed Gen Z”).
-
Choose how you’d like to source your participants:
- Recruit new participants — click Set screener to build custom questions that vet testers before they join the panel
- Use an existing panel — use the Select panel dropdown to pull participants from a previous study or saved panel
- Bring your own participants — invite your own customers or external contacts directly to Peppermint (Coming Soon — click Notify me to be alerted when it launches)
-
Click Continue.
-
If you chose Recruit new participants, you’ll move to the screener builder. Add your questions using Single Select or Multi-Select question types, then click Next: Review & Publish.
-
Review your screener questions in the preview panel. When you’re satisfied, click Create Panel.
-
A Ready to create this panel? confirmation dialog appears. Read the warning carefully — once published, screener questions and qualifying criteria cannot be edited. Click Continue to publish.
Your panel is added to the Panels list. Participants who meet your screener criteria are added automatically as they respond.
Viewing Your Panels
Section titled “Viewing Your Panels”-
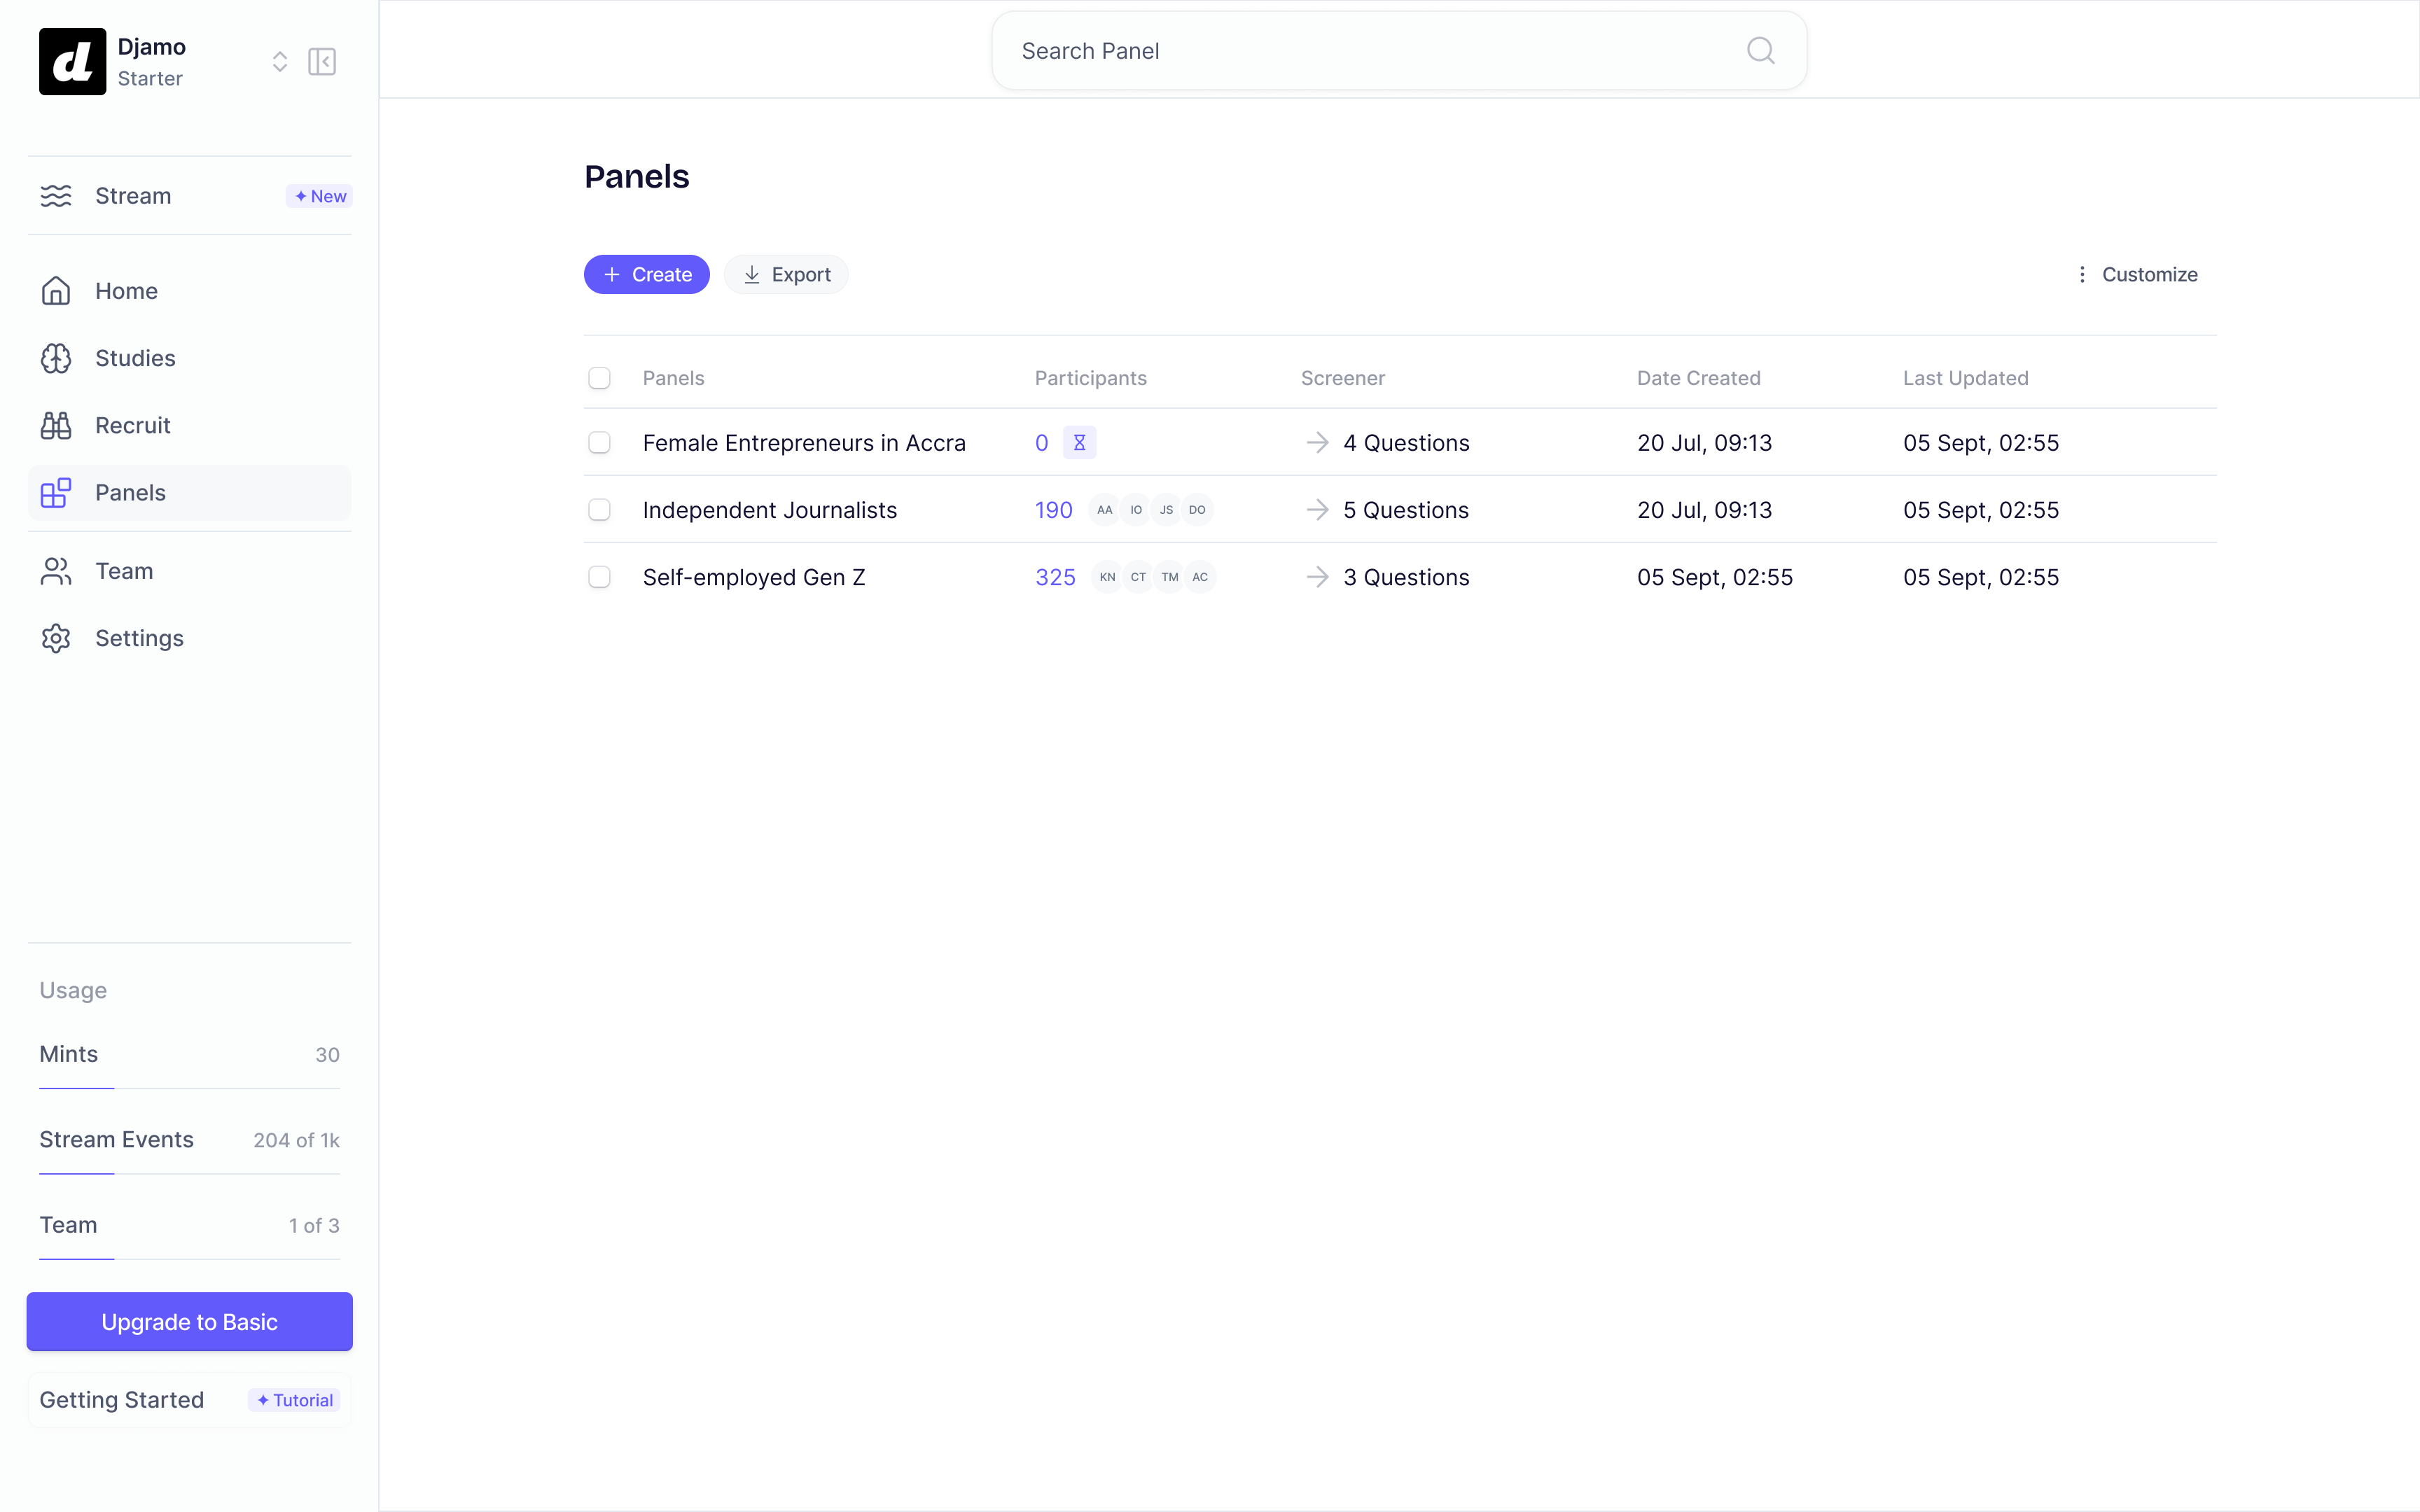
Click Panels in the left navigation.
-
Your panels are listed with each panel’s name, participant count, screener question count, date created, and last updated date.
-
Click a panel name to open it. Inside, you’ll see the Qualified respondents table showing each participant’s name, age, profession, education, income, household status, and date joined.
Key Actions
Section titled “Key Actions”- + Create — Start a new panel and choose how to source participants.
- Set screener — Build custom screening questions to qualify participants before they join the panel.
- Select panel — Pull participants from a previous study or saved panel when creating a new one.
- Export — Export panel data for use outside Peppermint.
- Remove — Remove a respondent from a panel without deleting them from your workspace.
- Customize — Choose which columns appear in the panels list or respondents table.
Tips & Best Practices
Section titled “Tips & Best Practices”- Name panels by participant segment, not by study — panels are reusable, so study-specific names become confusing quickly.
- Always add a “None of the above” option to screener questions so participants who don’t fit aren’t forced to pick an incorrect answer. Peppermint surfaces this as a best practice in the screener builder.
- Review your qualifying answers carefully before clicking Create Panel — screener questions cannot be edited after a panel is published.
- Use the Screener column in the panels list to check how many questions are filtering your pool before selecting a panel for a new study.
What Happens Next
Section titled “What Happens Next”Once your panel is published, you can use it as a participant source when setting up a new study in Peppermint. Your panel will appear as a selectable option so you can recruit the right respondents without starting from scratch each time.
See also: Running a Study
FAQs & Common Issues
Section titled “FAQs & Common Issues”Q: What’s the difference between “Recruit new participants” and “Use an existing panel”?
A: Recruit new participants lets you define screener questions to find and qualify a fresh pool of testers. Use an existing panel pulls from respondents you’ve already vetted in a previous study or saved panel.
Q: Can I edit my screener questions after a panel is published?
A: No — once a panel is published, screener questions and qualifying criteria are locked. Peppermint shows a confirmation warning before you publish. If you need to change the criteria, create a new panel with updated questions.
Q: When will “Bring your own participants” be available?
A: This option is marked as Coming Soon. Click Notify me in the Build your panel dialog to be alerted when it launches.
Q: Why does my new panel show 0 participants?
A: Participants are added to the panel automatically as they complete and pass the screener. A count of 0 means no one has responded yet — this will update as responses come in.
Q: Can my teammates see and use my panels?
A: Yes — panels are shared across your Peppermint workspace. Any team member can view, recruit from, or export them.